There is a moment in every dumbbell snatch where everything has to happen at once. The hips snap open, the arm drives upward, the body drops underneath the weight, and the elbow locks out before the dumbbell has even had time to slow down. Get it right and you feel athletic in a way that a bicep curl will never deliver. Miss a step, and the weight drifts forward, your shoulder absorbs the load, and the whole thing falls apart.
That moment is exactly why the dumbbell snatch belongs in more training programs than it currently does. It occupies a strange middle ground. Most people scroll past it. That’s worth reconsidering.
What Is the Dumbbell Snatch?
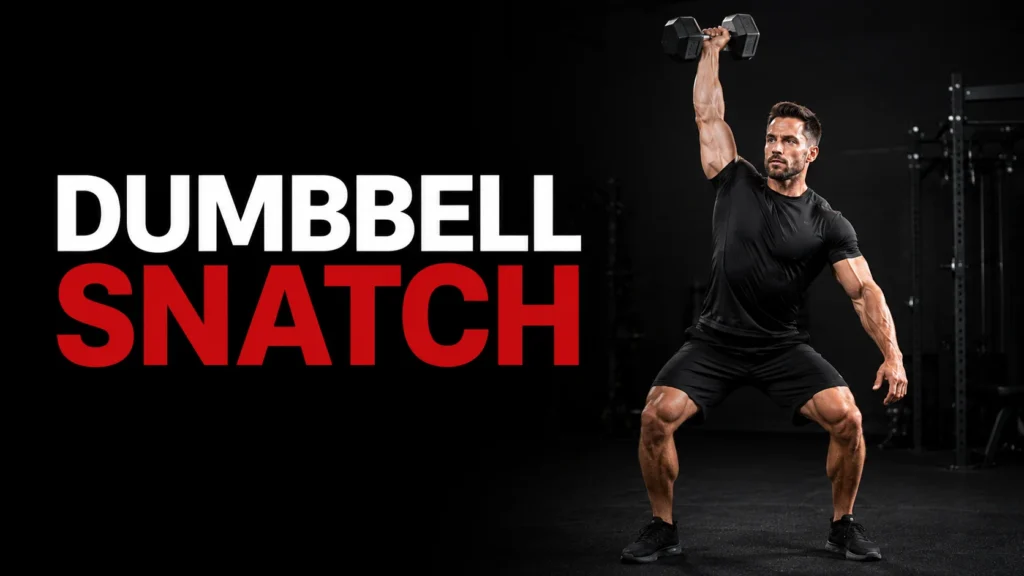
The dumbbell snatch is a single-arm, full-body power exercise that moves a dumbbell from the floor to a locked-out overhead position in one continuous motion. It’s the unilateral, dumbbell-based cousin of the barbell snatch used in Olympic weightlifting, borrowing the same core mechanical logic: generate enough force from your lower body to get the weight moving fast enough that you can get your arm underneath it before it stalls out.
The keyword in that description is “unilateral.” Because one hand does the work at a time, your body has to stabilize against the rotational pull of the dumbbell throughout the entire lift. Your core isn’t a bystander — it’s actively fighting to keep your torso from twisting. That’s a big part of what makes this movement more demanding and more useful than it looks from the outside.
The term “power snatch” often gets attached to the dumbbell version. In Olympic lifting, “power” means you receive the weight in a partial squat rather than a deep squat. For most people training outside a competition context, the power snatch version — hips above the knees at the catch — is the right starting point and stays relevant for most training goals.
Muscles Worked in the Dumbbell Snatch
Primary Movers
The glutes and hamstrings do the heavy lifting in the most literal sense. When pulling from the floor and aggressively extending the hips and legs to elevate the dumbbell overhead, these muscles are engaged in all phases of the lift. Without a strong, fast hip extension, the dumbbell doesn’t get enough vertical momentum to reach overhead, which means your arm has to compensate, and that’s when your shoulders get irritated, and the lift starts looking like a struggle.
The quadriceps contribute during the initial phase, when you’re pushing through the floor to lift the dumbbell off the ground. Think of it less as a squat and more as a leg press from a hinged position — you’re driving your feet through the floor while your hips hinge open.
The trapezius plays a role in scapular elevation and the explosive pull phase, firing hard during the shrug portion right after full hip extension when the dumbbell accelerates upward. The traps bridge your lower body power into your upper body, and weak traps are often the limiting factor for lifters who have decent hip drive but stall out halfway up.
Secondary and Stabilizing Muscles
The deltoids take over once the dumbbell is moving fast — they guide it into the overhead position and keep it stable once it arrives. The rear deltoids matter more than people expect, controlling the scapula during the catch and preventing the shoulder from collapsing forward under load.
The lats play a subtle but important role during the pull phase. They keep the dumbbell close to your body. A snatch where the weight drifts away from you is a snatch where the lats weren’t engaged. That cue sounds abstract until you feel the difference between a close-body pull and a swinging one.
The triceps lock the elbow at the top. The rhomboids stabilize the shoulder blade. The core muscles contract isometrically to allow for the efficient transfer of forces, keeping the torso stable and the torso angle consistent as the lifter pulls the weight from the floor. Because this is a single-arm movement, that core demand is asymmetric — you’re not just resisting front-to-back compression, you’re resisting rotation. That’s one of the most honest core training stimuli available in a free-weight context.
How to Do the Dumbbell Snatch: Step-by-Step Technique
The Setup
Place a single dumbbell on the floor between your feet. Stand with your feet hip-width to shoulder-width apart — not wider. Wider stances feel stable, but they reduce the power available through hip extension.
Hinge at the hips and reach down with one hand to grip the dumbbell. Your back should be flat, your chest up, and your free arm hanging or extended slightly for balance. Your hips should hinge just enough that you can reach the dumbbell — not so far that your thighs are parallel to the ground in a full squat position. If your hips are dropping toward the floor, you’re starting from the wrong position. This is a hinge, not a squat.
Keep your chin neutral — not tucked to your chest, not craned upward. Find the middle and hold it.
Phase One: The First Pull
From the floor, drive your feet into the ground and begin extending your knees. Your back angle stays roughly consistent through this first portion — you’re pushing the floor away, not pulling the dumbbell up yet. The dumbbell should remain close to your body as you raise it, ensuring that you’re driving the weight up with power from your legs and not your arms.
Your arm stays straight. This is worth saying twice. The arms should remain straight, and the shoulder should not shrug until the hips and knees have fully extended. Bending the arm early is common, and it turns a leg-driven force transfer into an arm curl — a much weaker and more injury-prone position.
Phase Two: The Drive and Shrug
Once the dumbbell passes your knees, your hips accelerate. This is the transition from controlled pull to explosive drive. Your hips snap forward and upward — think of jumping without actually leaving the ground. The key to a successful snatch is an explosive upward motion: extending your hips, knees, and ankles simultaneously to create upward momentum.
At the peak of that extension, your shoulder shrugs upward on the working side. Not before — and-after. The shrug happens at full hip extension, not as a shortcut to get the weight moving early. Full hip extension is what separates the efficient snatch from the strained one, and it keeps your back and shoulders from taking the brunt of the weight.
Phase Three: The Catch and Lockout
As the dumbbell reaches chest height and continues upward, your arm begins to rotate and punch through. Your elbow flips under the dumbbell — not by muscling the weight up, but by getting your body underneath it as it reaches the peak of its arc. Your hips and knees bend slightly to receive the load.
Lock your elbow out fully. A soft elbow at the top is both a safety issue and a form fault. The dumbbell should sit directly over your shoulder joint, not forward or out to the side. Stand tall, pause for a beat, then lower the dumbbell with control back to the floor.
Common Mistakes and How to Fix Them
Pulling with the Arm Instead of Driving with the Hips
Pulling the weight with the arm instead of using the legs reduces power and strains the upper body. This is the number one error. It usually happens because people think “lift the dumbbell” rather than “push the floor away.” Fix it by consciously thinking about leg drive through the first two phases, and drill the high pull — where the arm simply acts as a connection between your hips and the dumbbell — before attempting the full snatch.
Bending the Arm Early
When the arm bends early, power output and efficiency are reduced, the dumbbell may move away from the body, and fatigue arrives prematurely. A useful drill: perform two slow Romanian deadlifts followed immediately by one snatch. The deadlift pattern reinforces where your hips need to be at full extension before the shrug and pull happen.
Letting the Dumbbell Drift Forward
If the dumbbell swings away from your body at any point, your lat isn’t engaged. This also turns the overhead catch into a forward-loaded position, which the rotator cuff handles poorly under repeated exposure. The cue that tends to work: imagine dragging the dumbbell up the inside seam of your leg and torso — the intent keeps it close even if it doesn’t literally stay in contact.
Starting Too Low
Your hips should hinge just enough that you can reach the dumbbell, not so far that your thighs are parallel to the ground. A deep squat starting position loads the quadriceps rather than the posterior chain and limits how much power the glutes and hamstrings can contribute to the drive.
Overhead Position Problems
An unlocked elbow or a dumbbell positioned forward of the shoulder creates instability that compounds over time. At lockout, the arm should be vertical, the elbow fully extended, and the dumbbell stacked directly over the shoulder joint. If you consistently can’t reach a stable overhead position, the limiting factor is usually thoracic mobility or shoulder flexibility — both of which respond well to specific warm-up work like wall slides, thoracic extensions, and band pull-aparts.
Benefits of the Dumbbell Snatch
Explosive Power Development
This exercise trains the neuromuscular system to produce force rapidly. The hip extension pattern here is the same mechanical pattern that powers sprinting, jumping, and athletic changes of direction. Research cited in the NSCA’s Essentials of Strength Training and Conditioning notes that Olympic-style lifts and their variations recruit more muscle mass and require greater motor unit activation, particularly in the posterior chain and shoulders, compared to traditional strength exercises. The dumbbell version is the most accessible entry point to that style of training.
Unilateral Strength and Imbalance Detection
During bilateral movements, one side may be doing more work, but you’d never know it. Try a unilateral exercise, and any weaknesses are on full display. The dumbbell snatch makes imbalances visible quickly — not just in raw strength, but in timing, coordination, and stability. Fixing those asymmetries pays dividends in barbell performance, athletic output, and long-term injury resilience.
Real Metabolic Conditioning
Multi-joint movements have a higher metabolic cost and promote greater excess post-exercise oxygen consumption (EPOC), contributing to increased fat oxidation. For high-rep sets, dumbbell snatches drive the heart rate up as effectively as most conditioning equipment — and they build something in the process rather than just burning calories.
Shoulder Stability That Actually Transfers
The overhead catch position is a shoulder and scapular stability drill because you have to control the weight directly over your shoulder, hip, and foot while your trunk fights rotation underneath. This trains the rotator cuff and scapular stabilizers under dynamic load — the kind of training that translates to better overhead pressing and less shoulder discomfort over time.
Unilateral Core Training
Unilateral exercises activate the core muscles to a greater extent and improve balance and functional strength, especially when performed dynamically. The single-arm nature of the dumbbell snatch turns every rep into a rotational stability challenge. Your obliques and deep stabilizers work harder here than in most dedicated “core” exercises.
Dumbbell Snatch Variations
Hang Dumbbell Snatch
The lift begins from above the knees rather than the floor. This version removes the floor pull and makes it easier to focus on the drive and catch without worrying about the setup. It’s also useful if you have limited space or if the full floor-to-overhead range aggravates your lower back. Most coaches recommend learning the hang version first before adding the floor pull.
Alternating Dumbbell Snatch
The alternating dumbbell snatch transfers the dumbbell from one hand to the other between repetitions, often in the down phase of the lift. This cyclical, rhythmic transfer from side to side can allow the lifter to increase work capacity and make the movement more aerobic in nature due to longer duration sets. It’s a common format in CrossFit conditioning workouts.
Dumbbell Squat Snatch
You drop into a full squat at the catch rather than a partial squat. This dramatically increases the technical and mobility demands, particularly at the ankle and thoracic spine. It’s a useful progression toward barbell Olympic lifting, but it requires patience and solid baseline mobility before adding load.
Dumbbell Muscle Snatch
The legs stay relatively straight after the drive phase — the weight gets pulled into the overhead position primarily by the upper body. This variation is commonly used for workouts that involve light weight and high reps to maximize efficiency. It reduces skill demand but also reduces power development — useful in specific contexts, not as a permanent substitute.
Dumbbell Snatch from an Elevated Surface
Starting from a low box or step reduces the range of motion required at setup, making it accessible for athletes with limited hip or ankle mobility. It’s a temporary accommodation, not a permanent one — the goal is to work toward full floor range over time.
How to Program the Dumbbell Snatch
For Beginners
Start with 3 sets of 3 to 4 reps per arm using a weight light enough to move cleanly on every rep. The priority is the pattern, not the load. If you’re brand new, use a snatch progression: master the deadlift, then the high pull, then the hang power snatch before going from the floor.
For weight selection: women typically start between 10 and 20 pounds, men between 20 and 35 pounds. These are starting points. If your form breaks down, the weight is too heavy.
For Conditioning Goals
For conditioning, try as many as 10 sets of 5 reps with a light weight and limited rest. Alternatively, structure it as an EMOM — 5 snatches per arm alternating every minute for 10 to 12 minutes. This keeps the heart rate elevated while still demanding form across fatigue.
For Power Development
Four sets of 3 to 5 reps per arm with 90 to 120 seconds of rest. The goal is speed and force — each rep should be as explosive as the last. If a rep looks slow, either the weight is too heavy for that purpose or fatigue is accumulating. Reset and go again with fresh intention.
For Intermediate Lifters
Three sets of 8 to 10 reps per arm, increasing the weight as form allows. Intermediate lifters can also pair snatches with complementary movements — dumbbell rows, push-ups, or goblet squats — to keep the session efficient without sacrificing quality.
Strength Standards for Reference
The average dumbbell snatch for a trained male lifter is around 76 pounds for a one-rep max, placing them at the intermediate level. Female lifters average around 44 pounds. Male beginners typically start around 24 pounds, and female beginners around 13 pounds. These numbers give you a rough benchmark, but they shouldn’t drive your training decisions — form quality matters more than where you land on a table.
Progressions: Building Up to the Full Movement
Dumbbell Deadlift
Establishes the hip hinge mechanics that the snatch depends on. Before attempting the snatch, you should be able to deadlift with a flat back, loaded posterior chain, and controlled pull. Every fault in the snatch setup — rounded back, hips too low, dumbbell drifting forward — is usually a deadlift pattern problem in disguise.
Dumbbell High Pull
Start from the hang position and drive the elbow high and wide as the hips extend. This is the pull phase of the snatch without the catch. It teaches hip-to-shoulder force transfer and trains the traps to fire at the right moment. Once this pattern feels automatic, the full snatch becomes easier to coordinate.
Dumbbell Shrug
Isolates the trap activation needed for the second pull. Shrugs develop trap activation crucial during the second pull of the snatch when the dumbbell accelerates upward, and practicing them enhances the mind-muscle connection while building the upper back strength necessary to handle explosive loads. Hold the peak contraction briefly — the goal is to feel exactly where that upward force originates.
Frequently Asked Questions (FAQs)
Is the dumbbell snatch good for beginners?
Yes, with appropriate expectations. The dumbbell snatch requires less technique, mobility, and arguably less skill than the barbell snatch, making it a good option for beginner lifters. That said, “beginner to lifting” and “beginner to this movement” are different situations. If you’ve been training for less than a few months, build a foundation of hip hinge and overhead pressing before adding snatches. If you’re experienced but new to this specific exercise, start light and progress on form before load.
How heavy should I go on the dumbbell snatch?
Heavy enough that genuine hip drive is required — if it feels like a shoulder raise, the load is too light. Light enough that your mechanics hold across every rep of the set. Most beginners land somewhere between 15 and 35 pounds, depending on size and training background.
Do I have to squat at the bottom of a dumbbell snatch?
No, not for the power version. The hips must stay above the tops of the knees in the power snatch — that’s what “power” means in this context. A full squat snatch is a separate, more advanced variation with significantly higher mobility requirements.
How many reps should I do per arm?
For power: 3 to 5 reps. For strength-endurance: 6 to 10 reps. For conditioning, the movement can be performed for sets of upwards of 30 to 50 reps with light to moderate loads. Match the rep range to your actual goal, not just what feels manageable.
Should I alternate arms each rep or finish one side first?
Both are valid. Completing all reps on one side first is more common for strength and power work — it allows full focus on one side without the cognitive overhead of switching. Alternating arms each rep is more common in conditioning formats and creates a more rhythmic, aerobic quality to the session.
What’s the difference between a dumbbell snatch and a dumbbell clean?
In the clean, the dumbbell stops at the shoulder in a rack position. In the snatch, it continues all the way to a fully locked-out overhead position in one uninterrupted motion. The snatch requires more vertical momentum, more timing, and more overhead mobility.
Can the dumbbell snatch replace the barbell snatch?
Not for competitive weightlifters, since the barbell snatch has specific technical demands with direct carryover to competition performance. For general athletes, CrossFit competitors, and anyone training for fitness, the dumbbell snatch enhances shoulder stability, strength, and power for lifters of all levels and trains most of the same physical qualities without requiring the same equipment or coaching investment.
Does the dumbbell snatch build muscle?
It contributes, though hypertrophy isn’t its primary value. The glutes, hamstrings, traps, deltoids, and spinal erectors all take meaningful work across a snatch session. For deliberate muscle building, pairing snatches with higher-volume accessory work on those specific muscle groups gives better results than snatches in isolation.
Is the dumbbell snatch a CrossFit exercise?
The movement appears frequently in CrossFit programming and has featured in the CrossFit Open, but it predates CrossFit and isn’t exclusive to it. It’s used in Olympic lifting prep, general athletic training, HIIT, and functional fitness contexts well outside the CrossFit ecosystem.
What should I do if the dumbbell swings out in front of me?
Focus on lat engagement during the pull phase. The dumbbell should stay as close to your body as possible to ensure better control and reduce the risk of swinging. Reduce the load, drill the high pull pattern, and return to the full snatch once the close-body path feels natural.
In conclusion
The dumbbell snatch earns its place in a training program because it trains things that matter in practice: producing force quickly, stabilizing an asymmetrical load, and developing the kind of full-body coordination that carries over to athletic performance. You’re building more than muscle.
The learning curve is real. Take it seriously rather than rushing it. Start with the progressions, keep the weight lighter longer than feels necessary, and treat early reps as skill practice rather than exercise. Once the pattern clicks, the dumbbell snatch becomes one of those movements you genuinely look forward to training. Few things in the weight room feel as complete as a fast, clean snatch where every phase connects exactly as it should.