Most people who train legs regularly cycle through the same handful of movements — squats, deadlifts, walking lunges, leg press — and wonder why their glutes aren’t responding the way they hoped. The answer is usually not volume. It’s a variety. Specifically, it’s the absence of lateral plane loading, and that’s precisely where dumbbell curtsy lunges earn their place in a serious lower body program.
What Are Dumbbell Curtsy Lunges?
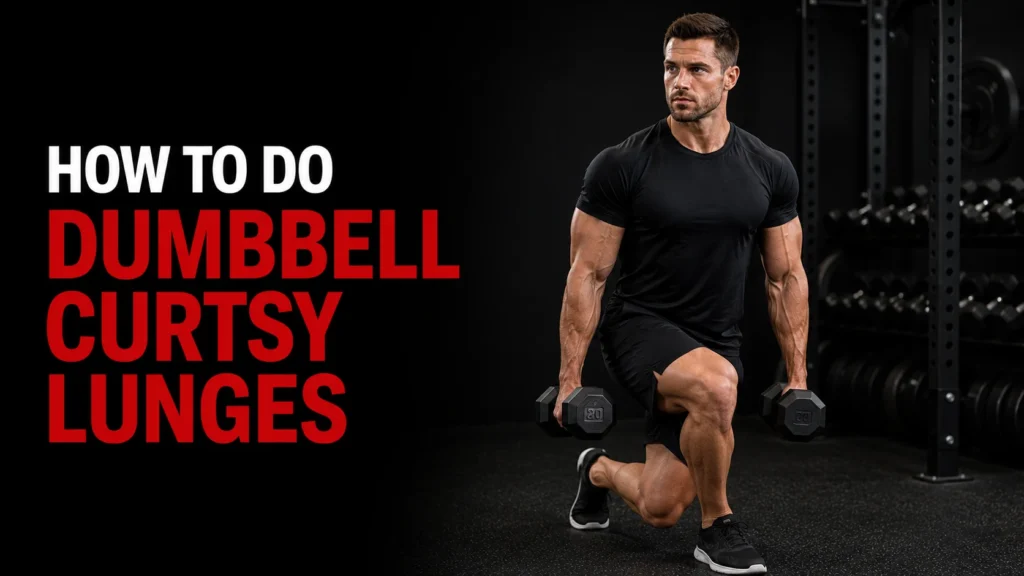
A dumbbell curtsy lunge is a unilateral lower body exercise where you step one foot back and diagonally across the midline — behind the opposite leg — while holding a dumbbell in each hand. You lower until your back knee approaches the floor, then return to standing. The name comes from the resemblance to a formal curtsy bow.
What separates it from a reverse lunge isn’t just foot placement. The crossover position changes the hip angle entirely, shifting the workload onto muscles that a straight-back lunge never meaningfully loads. Specifically, the gluteus medius — the muscle on the outer side of the hip responsible for hip abduction and pelvic stability — gets pulled into the primary work. That’s a muscle that standard sagittal-plane exercises like squats and forward lunges tend to leave undertrained.
The dumbbells add load without restricting natural movement patterns. Unlike a barbell, which locks your torso into a fixed alignment, two dumbbells at your sides allow your body to find its natural path through the movement and make micro-adjustments for balance. That’s a real advantage for a movement that already challenges coordination.
Muscles Worked During Dumbbell Curtsy Lunges
Gluteus Medius (Primary Target)
This is the exercise’s calling card. The gluteus medius sits on the outer surface of the ilium and is responsible for hip abduction and pelvic stabilization during single-leg loading. In a curtsy lunge, the standing leg’s glute medius has to work hard to prevent the hip from dropping as your body weight shifts across the midline. Most lower body exercises neglect this muscle almost entirely because they never challenge it in this rotational, stabilizing way.
A weak gluteus medius shows up in other places — knee valgus during squats, hip drop during running, and lower back irritation during deadlifts. Strengthening it through curtsy lunges often fixes problems that don’t seem connected at first.
Gluteus Maximus
The glutes as a whole do significant work in any lunge pattern, and the curtsy lunge is no exception. The crossover position places the hip in a slightly adducted angle at the bottom, which stretches the gluteus maximus more than a conventional lunge does. More stretch under load generally means more mechanical tension — which is a primary driver of muscle growth.
Quadriceps
The quads drive the knee extension on the way back up. Because the front leg takes the majority of the loading in a curtsy lunge, the quad on that side gets a substantial training stimulus. If glute development is the main goal, keeping the torso more upright shifts demand toward the glutes; leaning slightly forward shifts more work onto the quad.
Hip Adductors (Inner Thighs)
The crossed-leg position forces the hip adductors to both contribute to the movement and resist unwanted lateral movement. This is another underserved muscle group in most training programs. The adductors assist in hip extension too, which means they’re doing more than people think during the descent and drive phases.
Hamstrings
The hamstrings work as secondary movers, particularly during the descent phase to control the speed of the lunge and assist in hip extension during the drive back up.
Core and Stabilizers
Holding a dumbbell in each hand with no fixed axis to brace against means your core has to stabilize your torso actively throughout the movement. The obliques and transverse abdominis work to prevent lateral tilt as you cross one leg behind the other.
How to Do Dumbbell Curtsy Lunges With Correct Form
Starting Position
Stand with your feet hip-width apart, holding a dumbbell in each hand with a neutral grip (palms facing your thighs), arms hanging straight at your sides. Your shoulders should be back and down, chest up, gaze forward. This isn’t just about posture — keeping your chest upright throughout the set directly influences how much glute activation you get. If your torso pitches forward, the stimulus shifts away from the glutes.
The Descent
Take a deliberate step back with your right foot, crossing it behind and to the outside of your left leg. Your right foot should land roughly behind your left heel, on the ball of the foot — not flat. Placing your back foot flat on the floor risks overextension in the back knee and limits range of motion.
As your back foot makes contact, bend both knees simultaneously and lower your hips straight down. Your front knee should track over your toes, not caving inward. Lower until your back knee is about an inch from the floor or gently touches it. Your front thigh should approach parallel to the floor, though full range is the goal only once your hip mobility and balance allow it.
Keep your hips facing squarely forward throughout. The most common error in this position is allowing the hip to rotate outward as the leg crosses — that changes the muscle loading completely and often leads to knee discomfort.
The Drive
Press through the heel of your front (left) foot and drive back to standing. Squeeze the glute of the front leg at the top. Bring your right foot back to the starting hip-width position, reset briefly, and then repeat on the same side for all planned reps or alternate to the left leg.
Foot Position Detail
Your front foot should stay flat throughout the movement, with the heel grounded. If your heel rises during the descent, your dumbbells are likely too heavy, your hip flexors are too tight, or you’re stepping too far — or not far enough — behind.
Common Mistakes That Limit Results and Raise Injury Risk
Knee Caving Inward (Valgus Collapse)
When the front knee tracks inward during the descent, it places shear force on the medial knee structures and usually indicates either weak hip abductors, tight hip adductors, or both. Focus on actively pushing the front knee outward over the second and third toes as you descend.
Not Crossing Far Enough Behind
A half-hearted crossover — where the back foot lands almost directly behind rather than diagonally across — reduces the hip adduction angle and takes much of the load off the gluteus medius. The diagonal matters. Think: if you drew a line from your back foot to your front foot, it should cross the midline.
Shallow Range of Motion
Stopping the descent before the back knee approaches the floor cuts the effective range short and reduces the time under tension for the glutes and adductors. A partial rep occasionally makes sense as a training tool, but doing them habitually because the full range feels hard just means the full range is where you need to be training.
Hip Rotation
Allowing the hip on the stepping leg to rotate backward as you cross behind essentially undoes the crossover. It’s a compensation that the body uses to make the movement feel easier, but it changes what muscles are working. Film yourself from the front occasionally to check that your hips stay level and square throughout.
Leaning the Torso Forward
Some forward lean is acceptable and mechanically unavoidable for taller individuals or those with longer femurs. But excessive forward lean shifts loading from the glutes to the lower back, which is both less effective and harder on the spine under load. Think about keeping your chest up and your eyes at the horizon.
Flat Back Foot
Landing the back foot flat rather than on the ball of the foot limits ankle mobility and tends to push the back knee forward, compressing the joint. The back heel should stay elevated throughout the lunge.
How to Add Weight Intelligently
Where to Start
If you’re new to curtsy lunges, do the bodyweight version first. The movement pattern is complex enough that loading it before mastering the balance and foot placement is counterproductive. Spend a week doing 2–3 sets of 10–12 reps per leg with no weight, focusing entirely on form.
Dumbbell Position Options
The standard approach is one dumbbell in each hand, held at your sides. This is the most balanced loading option and keeps the movement honest. A second option is holding a single dumbbell at chest height (goblet style), which shifts the center of mass higher and makes the core work harder. A third, more advanced option is holding one dumbbell on one side only — an offset load that forces significant anti-lateral-tilt work from the obliques and makes the exercise considerably harder without adding plate weight.
Weight Progression
For endurance and toning goals, 3 sets of 10–12 reps per leg with moderate weight works well. For building strength and muscle, work in the 3–4 set range at 8–10 reps per leg with heavier dumbbells, treating the curtsy lunge as an accessory movement after your primary squats or deadlifts. Beginners often find that even 5–10 lb dumbbells are sufficiently challenging when the range of motion is full and controlled.
Don’t chase heavy weight at the expense of balance. This exercise requires significant coordination, and adding load beyond what your balance can support results in compensated reps that train the wrong things.
Dumbbell Curtsy Lunge Variations
Curtsy Lunge With Pause
Add a 2-second hold at the bottom position. This eliminates the elastic rebound that makes the drive phase easier, increases time under tension, and dramatically increases the difficulty without adding any weight. It’s the fastest way to make an already challenging exercise harder.
Curtsy Lunge With Pulse
At the bottom of each rep, lower an inch, raise an inch, then drive back up. The pulse burns out the glutes and quads in the lower range, where they’re mechanically less advantaged. Use this for metabolic conditioning at the end of a leg session.
Alternating Curtsy Lunge
Instead of completing all reps on one leg before switching, alternate sides with each rep. This keeps the heart rate higher and adds a balance challenge during the transition between sides. It’s a good format for conditioning work or circuit training.
Curtsy Lunge to Side Kick
At the top of each rep, instead of simply stepping together, drive the stepping leg out to the side in a controlled kick. This adds glute medius work at the top of the movement and increases single-leg balance demand on the standing leg.
Curtsy Lunge With Side Lunge Combo
Take a step to the right into a side lunge (keeping the left leg straight and sitting back into the right hip), then step the right foot behind and across into a curtsy lunge. One side lunge plus one curtsy equals one rep. This hits the adductors from two different angles within a single sequence and works well for people building functional hip mobility alongside strength.
Deficit Curtsy Lunge
Stand on a small step or weight plate with your front foot. The elevation increases the range of motion for the back leg and the stretch on the front glute. This is an advanced variation that requires solid hip mobility and balance before attempting.
Programming Dumbbell Curtsy Lunges in Your Workout
The curtsy lunge fits best as an accessory movement — meaning it comes after your primary compound lifts rather than leading the session. On a standard lower body day, after squats and Romanian deadlifts, 3–4 sets of curtsy lunges address the lateral plane work and glute medius that those two movements mostly skip.
For a full-body training schedule, curtsy lunges work well as part of the lower body block or in a superset with an upper body pull like dumbbell rows. The exercise doesn’t create so much systemic fatigue that it interferes with other movements the way heavy squats can.
For people following a HIIT or circuit format, bodyweight or light dumbbell curtsy lunges (12–20 reps per leg) fit naturally into a lower body circuit. The movement gets the heart rate up, targets the glutes and inner thighs, and requires no equipment beyond a pair of light dumbbells.
Rest periods of 45–90 seconds between sets are appropriate for hypertrophy work. For strength, rest 2 minutes or more to ensure full recovery between heavier sets.
Curtsy Lunge vs. Reverse Lunge: Understanding the Real Difference
People often ask whether the curtsy lunge is just a fancy reverse lunge. The difference is real and worth understanding, because they don’t produce the same training effect.
A reverse lunge keeps both feet roughly hip-width apart, loading the gluteus maximus and quads along the sagittal plane. The gluteus medius plays a minimal role because the hip stays in a neutral abduction position.
In a curtsy lunge, the crossover step places the hip in relative adduction, which stretches and then contracts the gluteus medius on the standing leg in a way the reverse lunge never achieves. The adductors of both legs also get more work because of the crossed position.
If you’re choosing between the two for general leg training, use both. The reverse lunge builds mass in the glute maximus and quads more efficiently. The curtsy lunge fills in the stability and abductor work that the reverse lunge skips.
Who Benefits Most From Curtsy Lunges
Runners benefit from the hip abductor and stabilizer strength that the curtsy lunge builds. Hip drop during the gait cycle — a common issue for recreational runners — is often a direct consequence of gluteus medius weakness.
Anyone who experiences knee valgus during squats can use curtsy lunges as corrective work. Strengthening the hip abductors through this movement often reduces inward knee tracking during other exercises within a few weeks of consistent training.
People focused on glute aesthetics get more out of curtsy lunges than most exercise libraries suggest. The gluteus medius on the outer hip contributes to the visual fullness and roundness of the glute area. Training it specifically through loaded curtsy lunges develops a shape that glute bridges and hip thrusts don’t fully replicate.
Athletes in sports involving cutting, lateral movement, and single-leg landings — basketball, soccer, tennis — develop hip stability that directly transfers to sport-specific demands.
Frequently Asked Questions (FAQs)
What muscles do dumbbell curtsy lunges work?
The primary target is the gluteus medius, which handles hip abduction and stabilization. The gluteus maximus and quadriceps also carry significant load. Hip adductors, hamstrings, and calves all contribute as secondary movers, and the core — particularly the obliques — works throughout to stabilize the torso.
Are curtsy lunges better than regular lunges for the glutes?
Neither is universally better — they train different parts of the glute complex. Standard forward and reverse lunges load the gluteus maximus more directly. Curtsy lunges target the gluteus medius in a way that sagittal-plane lunges cannot. For complete glute development, you need both.
How heavy should the dumbbells be for curtsy lunges?
Most people do well starting with 8–15 lb dumbbells per hand once they’re comfortable with the bodyweight version. The movement demands coordination in addition to strength, so going heavier than balance allows produces poor reps. A working weight that allows full range with controlled form across all reps of a set is the right weight — for most trained individuals that lands somewhere between 15 and 30 lb per hand.
Is it better to alternate sides or do all reps on one side first?
Both approaches have merit. Doing all reps on one side before switching (ipsilateral sets) maintains consistent fatigue in that leg and builds endurance tolerance. Alternating sides keeps the rest period between legs longer, which can allow heavier loads. For beginners, alternating is usually easier to learn. For more advanced training, ipsilateral sets are more specific.
Can curtsy lunges cause knee pain?
Performed with good technique, no. The most common cause of knee discomfort during curtsy lunges is the front knee caving inward (valgus), stepping with too short a crossover (which puts the back knee in an awkward position), or landing the back foot flat. Fixing foot position and tracking the front knee over the toes resolves the issue in most cases. If discomfort persists, reduce the range of motion or reduce the load.
How many sets and reps should I do?
For muscle building: 3–4 sets of 8–10 reps per leg with moderate to heavy weight. For endurance and conditioning: 3 sets of 12–15 reps per leg with lighter weight. For warm-up or activation: 1–2 sets of 10–12 reps without added weight. Adjust based on where the curtsy lunge sits in your session — earlier with heavier load, later in a circuit with lighter load and higher reps.
Do curtsy lunges help with hip dips?
Hip dips are largely structural — they reflect the shape of your ilium, not just muscle size. That said, developing the gluteus medius through exercises like dumbbell curtsy lunges can reduce the visual appearance of hip dips by adding muscle volume to the outer hip. It won’t eliminate the underlying bone structure, but it does change the overall shape more than people expect when trained consistently over several months.
Can beginners do dumbbell curtsy lunges?
Yes, with appropriate progression. Start without weights and use a wall or chair for light balance support if needed. Prioritize the crossover mechanics and knee tracking before adding any load. Most people can hold light dumbbells within 1–2 weeks of starting the bodyweight version, provided they’re focusing on form rather than just getting through the reps.
Where do curtsy lunges fit in a leg day workout?
After primary compound movements like squats and deadlifts. Treat them as an accessory exercise rather than the main event. They’re excellent for targeting glute medius and adductors that your primary lifts underserve. Two to four sets after your main lifts is a practical and effective approach.
How are curtsy lunges different from side lunges?
A side lunge moves the foot directly to the side while the other leg stays straight. A curtsy lunge crosses the foot back and behind the opposite leg while both knees bend. Side lunges load the adductors more on the stepping leg. Curtsy lunges load the glute medius and adductors of both legs simultaneously and demand more from the stabilizers of the front leg. Both deserve a place in a well-rounded lower body program.
In conclusion
Dumbbell curtsy lunges aren’t a novelty exercise. They fill a real gap in most lower-body programs by loading the gluteus medius and hip adductors in a way that squats, deadlifts, and even most lunge variations simply don’t address. The movement requires some patience to learn — the crossover mechanics feel strange initially and the balance demand is real — but the payoff is worth the investment. Whether the goal is rounder glutes, better hip stability for sport, correction of knee valgus, or simply fresher programming after years of the same movements, curtsy lunges with dumbbells deliver. Start with bodyweight, nail the mechanics, then add load progressively. That’s it.
Want to isolate your triceps and improve arm definition? Check out How to Do a Dumbbell Tricep Kickback for proper form, common mistakes to avoid, and tips for better muscle activation.