If you’ve been curling consistently for months and your arms still look roughly the same, the problem probably isn’t your work ethic. It’s likely your exercise selection, or more precisely, the angle at which you’re loading your biceps.
Dumbbell spider curls fix that. They’re not a trendy variation someone invented for social media. They’ve been a staple in serious bodybuilding circles for decades because they do something most curl variations can’t: they remove every way to cheat the movement and force your biceps to work through the entire range of motion under constant tension.
What Are Dumbbell Spider Curls?
A dumbbell spider curl is a biceps isolation exercise performed face-down on an incline bench set to roughly 45 degrees. You lie chest-against-pad with your arms hanging freely in front of your torso, then curl the dumbbells upward using only elbow flexion — no shoulder involvement, no body sway, no momentum.
What makes this different from a standard standing curl isn’t just the angle. It’s the mechanical constraint. In a standing curl, you can subtly lean back, shrug your shoulders, or let your elbows drift forward to grind through a tough rep. With spider curls, your torso is pinned to the bench. There’s nowhere for the momentum to come from except your biceps.
Unlike other curl variations, the incline bench provides chest support that keeps the torso rigid, which prevents other muscle groups from lifting the load and forces the biceps to work at their hardest. That’s the simple mechanical reason this exercise has survived decades of shifting fitness trends.
The Anatomy: Why Body Position Changes Everything
The Biceps Brachii
The biceps brachii is a two-headed muscle — the long head on the outer arm, the short head on the inner arm. Both heads cross the elbow joint (controlling flexion) and the shoulder joint (contributing to shoulder flexion and forearm supination). That dual-joint crossing is what makes arm position so significant during any curl variation.
When your arm hangs in front of your body during a spider curl, you create some shoulder flexion. This flexion puts slack into the long head of the biceps, which prevents it from performing as much work, so the short head picks up the load. That’s the anatomical explanation for why spider curls target a different portion of the biceps than most people train.
Short Head vs. Long Head: Why Both Matter
The long head is located on the outside of the arm and is responsible for the way your biceps look when viewed from the side and behind. The short head is on the inside of the arm and gives your biceps size and thickness.
Most lifters overtrain the long head because incline curls and hammer curls dominate arm programs. The short head gets left behind, and the result is arms that have a visible peak but lack overall fullness. There is a lot of emphasis on developing the biceps peak by using long head movements, but short head movements, such as spider curls, create a more symmetrical look to the arm.
The Supporting Cast
Beyond the biceps brachii, spider curls pull in the brachialis — a muscle that sits beneath the biceps and, when developed, pushes the biceps outward to make the entire arm appear thicker even at rest. Any free-weight curl you perform will also involve the musculature of your forearm to some degree — many of the small muscles between your fingertips and elbow play intricate functions during a curl, and the isometric tension from gripping the dumbbell is great for joint stabilization.
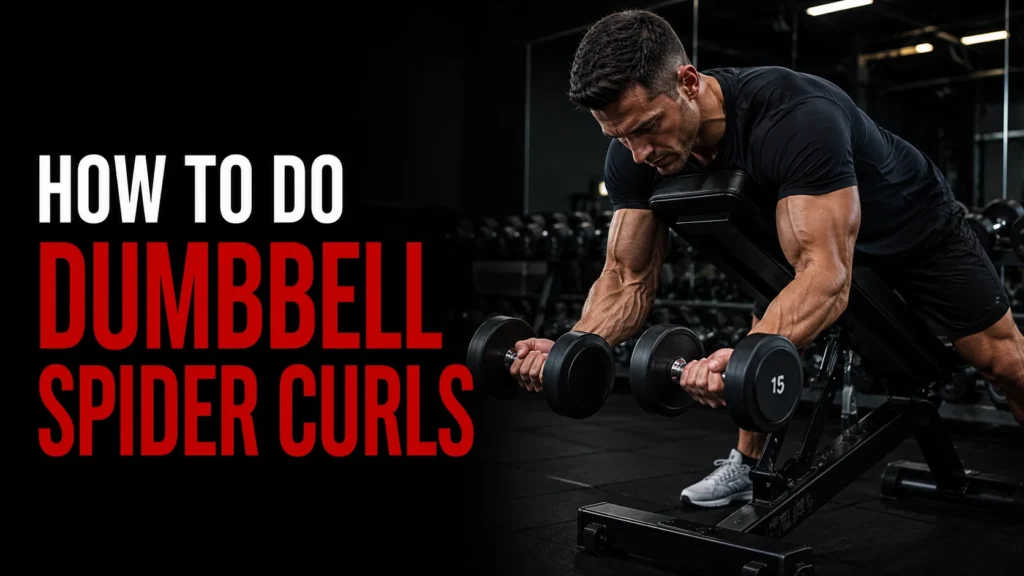
How to Do Dumbbell Spider Curls: Exact Setup and Execution
Equipment Setup
Set an adjustable bench to a 45-degree incline. This angle allows for a greater range of motion and better isolation of the biceps compared to a 30-degree angle, which might not provide the same level of muscle engagement and effectiveness. A steeper setting starts to resemble a standing curl and loses most of the isolation benefit.
Select dumbbells noticeably lighter than what you’d use for standing curls. Most lifters need to drop 20–30% when they first attempt spider curls with strict form — that’s not a weakness, that’s the exercise working as intended.
Starting Position
Lie face-down on the bench with your chest pressed firmly against the pad. Your legs should be long with a slight bend in your knees, and your weight should be on the balls of your feet. Let your arms hang straight down from your shoulders, maintaining a very slight bend in the elbows to keep tension on the biceps rather than loading the joint passively.
Grasp the dumbbells directly under your shoulders with palms facing forward, and maintain good body positioning by keeping your elbows under your shoulders throughout the movement.
The Curl
Without allowing your upper arms to move, exhale and curl the dumbbells upward by contracting your biceps. The only joint that should move is your elbow. Without moving your upper arms, flex your biceps and curl the weight up until your forearms are perpendicular to the floor. At the top of the curl, squeeze your biceps hard for 1–2 seconds to maximize muscle activation.
The Lowering Phase
Slowly lower the weight back down over 3–4 seconds, keeping tension on the biceps throughout the entire range of motion. Do not let the weight drop freely. Rushing the eccentric wastes half the exercise — the lowering phase is where a significant portion of muscle damage accumulates, and that damage is what drives adaptation.
Exhale as you curl up, inhale as you lower, and follow a 1-second lift, 1-second squeeze, and 2–3 second controlled descent for every rep.
The Five Mistakes That Ruin Spider Curls
1. Pulling the Elbows Back
This is the most common error, and it completely changes what the exercise trains. The most common mistake is pulling the upper arms back toward your body like you would when doing a row. This puts more emphasis on the lats, and your biceps don’t have to work as hard to curl the weight. Keep your elbows locked in place, pointing straight down throughout the entire rep.
2. Setting the Bench Too High
If your incline is closer to vertical, you’re not doing much to get the benefits of this variation since your arm angle will be nearly the same as when you do standing biceps curls. Look for that 45-degree incline, or even drop toward 30 degrees depending on your arm length.
3. Using Too Much Weight
Ego weight is a problem with every curl, but spider curls are particularly unforgiving. If you’re swinging the curl motion, rocking your upper body, or rushing through reps, you’re turning spider curls into a cheat curl — and that defeats the entire purpose of this isolation movement. Go lighter than feels comfortable at first, nail the form, and let the weight increase over weeks.
4. Rushing the Eccentric
A three-second descent feels painfully slow the first time you try it. That controlled lowering is exactly what makes the exercise productive. Many lifters rush the eccentric phase, missing half the growth stimulus. If you’re dropping the weight in one second, you’re discarding a large portion of each set’s potential.
5. Craning the Neck Upward
With your face angled toward the floor, many lifters crank their neck up to watch themselves in the mirror. Over a full set, that sustained neck extension adds unnecessary strain. Keep your neck neutral — gaze toward the floor — and trust your form rather than monitoring your reflection.
Dumbbell Spider Curl Variations
One-Arm Dumbbell Spider Curl
Performing the exercise with one arm at a time immediately exposes left-right strength imbalances that bilateral training can mask. Barbells make it easy for the dominant side to bear more of the load than the weaker side, but dumbbell work circumvents this problem. You can use spider curls to bring up a lagging biceps by performing a few extra reps on that side.
Reverse-Grip Spider Curl
Flip your grip so your palms face downward during the curl. By working with a pronated hand position, you shift some of the mechanical tension away from the biceps and toward other muscles — your brachialis, brachioradialis, and the various small muscles of your wrist take on much more of the load. Building the brachialis gives your arm a thicker, more three-dimensional appearance even when you’re not flexing.
Tempo Spider Curl
Rather than changing grip or equipment, manipulate the tempo. A 3-1-3 tempo (three seconds up, one-second hold, three seconds down) extends time under tension dramatically. This works well for lifters who’ve stalled on adding load and need a new stimulus without changing the fundamental movement.
Cable Spider Curl
Attach a low cable pulley to the base of the incline bench and use a cable handle instead of dumbbells. Dumbbells lose tension at the very top of the movement. Cables don’t. If you want unrelenting resistance through the entire range of motion, cables are a solid alternative.
Supinating Spider Curl
Start each rep with a neutral grip and rotate your palms upward as you lift — supinating through the movement. This mimics the natural biomechanics of the biceps brachii, which handles both elbow flexion and forearm supination. The supination recruits the biceps more fully and creates a stronger peak contraction at the top.
How to Program Dumbbell Spider Curls
Where They Belong in Your Workout
Spider curls are a finishing movement, not an opener. Start with heavier compound or bilateral exercises — barbell curls, EZ-bar curls — while your nervous system is fresh. Program spider curls mid to late workout for 3–4 sets of 8–15 reps with strict tempo. You want enough energy remaining to control the movement, but not so much that you haven’t already fatigued the target muscle.
Sets and Reps by Goal
For beginners learning the movement: 1–2 sets of 12–15 reps with light weight. The goal here is building motor pattern awareness, not chasing failure.
For muscle hypertrophy: 3–4 sets of 8–12 reps, taken to within 1–2 reps of muscular failure. The 10-rep range works particularly well with spider curls because the controlled tempo naturally extends time under tension.
For those just learning the movement, go for 1–2 sets of up to 15 reps with light weight. For muscle growth, try 3–4 sets of 6–8 reps, working close to muscular failure.
Strength Level data from over 58,000 recorded lifts shows the average male intermediate lifter handles around 73 lb for a spider curl one-rep max, with advanced lifters reaching approximately 122 lb. These numbers are useful benchmarks, not goals to rush toward at the expense of form.
Progressive Overload Beyond Just Adding Weight
Adding load is the obvious path, but it’s not the only one. You can also progress by:
- Slowing the eccentric phase by one second every few weeks
- Increasing reps before increasing weight (progressing from 3×10 to 3×12 before adding load)
- Extending the peak contraction hold from one second to two
- Adding a working set within a training block before cycling volume back down
Benefits of Training Dumbbell Spider Curls
Pure biceps isolation. The chest-supported position makes it difficult to recruit assisting muscles. Each rep is essentially honest.
Constant tension across the full range of motion. The upper-body movement pattern and posture of a spider curl keeps your arm muscles activated during the full range of motion. Unlike many curl variations where tension drops at the bottom, the hanging arm position keeps the biceps loaded throughout.
Addresses muscle imbalances directly. Training with dumbbells means each arm works independently, immediately revealing any strength or size asymmetries that a barbell would allow the dominant side to mask.
Effective with lighter loads. Because the isolation is so complete, you don’t need to load heavily to generate a strong training stimulus. This makes spider curls useful for lifters managing elbow tendinopathy or wrist issues who still need to train the biceps effectively.
Targets the short head specifically. Most arm training programs skew toward the long head. Spider curls fill a gap that almost every lifter has without realizing it.
Who Actually Benefits Most from Spider Curls?
Intermediate and advanced lifters get the most out of this exercise because they’ve already developed enough mind-muscle awareness to feel their biceps working under strict isolation. Beginners can learn the movement, but a few months of standard curls first helps build the baseline awareness that makes spider curls feel productive rather than just uncomfortable.
Lifters with visible arm asymmetry should run the one-arm variation and deliberately add extra sets on the weaker side for a training cycle. Spider curls make asymmetries impossible to compensate for, which is uncomfortable but exactly the point.
Anyone stalled on arm growth who’s been running the same two or three curl variations for the past year. Different joint angles produce different mechanical stimuli, and stagnation in arm size often traces back to insufficient variation in how the biceps are loaded across a training week.
Lifters managing joint issues who need productive biceps work without heavy loading. The isolation efficiency means you can generate a meaningful training stimulus with weights that don’t stress the elbow joint the way heavy barbell curls can.
Frequently Asked Questions (FAQs)
Are dumbbell spider curls better than barbell spider curls?
Both have a place. Dumbbells let each arm work independently, which exposes imbalances and prevents the stronger side from compensating. Barbells allow slightly heavier loading and may feel more stable if wrist position is a concern. For most lifters starting out, dumbbells are the better choice. For progressing load over time with less wrist discomfort, an EZ-bar is a solid middle ground.
How heavy should I go on spider curls?
Lighter than you think. Most lifters need to use 70–80% of their normal dumbbell curl weight when they first attempt spider curls with honest form. Start conservatively, prioritize the eccentric phase, and add load only when you complete the full rep range without elbow drift or torso movement.
Do spider curls build the biceps peak?
Spider curls primarily target the short head, which contributes to thickness and fullness rather than the tall, pointed peak that long head training creates. For peak development, incline curls or concentration curls are more direct. For complete arm development, you need both the peak that long head work builds and the fullness that spider curls provide.
Can I do spider curls without a bench?
Yes. You can approximate the position by hinging forward at the hips until your torso is roughly parallel to the floor and letting your arms hang freely in front of you. The hip-hinge version lacks the chest support that eliminates momentum, so discipline with arm position matters more. Some lifters also drape themselves over the edge of a flat bench with reasonable results.
How often should I train spider curls?
Once per week is adequate for most lifters when spider curls are combined with other curl variations. Twice per week fits if arm development is a primary training focus and you’re managing volume carefully. The biceps also receive indirect stimulus from every rowing and pulling exercise you do for the back, so total weekly biceps volume across your entire program matters more than per-session frequency.
Why do my elbows hurt during spider curls?
Elbow discomfort usually points to one of three things: the weight is too heavy, the eccentric is too fast, or the bench is set too steep. Reduce the load first, slow the lowering phase to three or four seconds, and confirm the bench is at 45 degrees or slightly lower. If discomfort continues, an EZ-bar or cable attachment reduces wrist and elbow stress compared to straight dumbbells.
How do spider curls compare to concentration curls?
Both isolate the biceps by locking the upper arm and removing momentum. Concentration curls work the long head of the bicep to build the bicep peak. A good way to work the entire bicep muscle is to finish your arm day with isolation moves — the spider curl for the short head and the concentration curl for the long head. Spider curls are more time-efficient since both arms work simultaneously, and they generally allow slightly heavier loading than single-arm concentration curls.
What grip should I use for dumbbell spider curls?
A supinated grip (palms facing forward) targets the biceps brachii most directly. A neutral or hammer grip shifts more emphasis to the brachialis and brachioradialis. For pure biceps development, start with a supinated grip. Add a neutral or pronated variation when you want to develop the supporting musculature for more complete arm thickness across all three planes.
In conclusion
Spider curls don’t get as much attention as barbell curls or preacher curls, partly because they feel humbling. The weight you can handle with honest form is noticeably lower than what you curl standing up, and that can be difficult to accept in a gym environment where loaded barbells get more respect than strict, lighter isolation work.
That lower weight is the exercise working exactly as designed. The entire value of spider curls comes from what they take away — the body sway, the elbow drift, the partial range of motion that lets most lifters feel productive without generating real stimulus. Strip all of that out, and what remains is a direct, concentrated load on the biceps that most people have never actually felt before.
Add dumbbell spider curls to your arm routine, drop the weight, slow the eccentric to three or four seconds, hold the peak contraction for a full count, and give the exercise six honest weeks. The difference in biceps fullness and overall arm development tends to be hard to argue with.
Want to build stronger glutes and improve lower-body stability? Check out How to Do Dumbbell Curtsy Lunges for step-by-step form tips, key benefits, and ways to get better muscle activation safely.