Most people who train at home hit a wall with back exercises. You can do push-ups, lunges, and planks until you’re bored, but the moment you need a real pulling movement, suddenly everything requires a cable machine or a pull-up bar bolted to a wall. That’s where the inverted row with dumbbells becomes genuinely useful, and far more underrated than it deserves to be.
What Is the Inverted Row With Dumbbells?
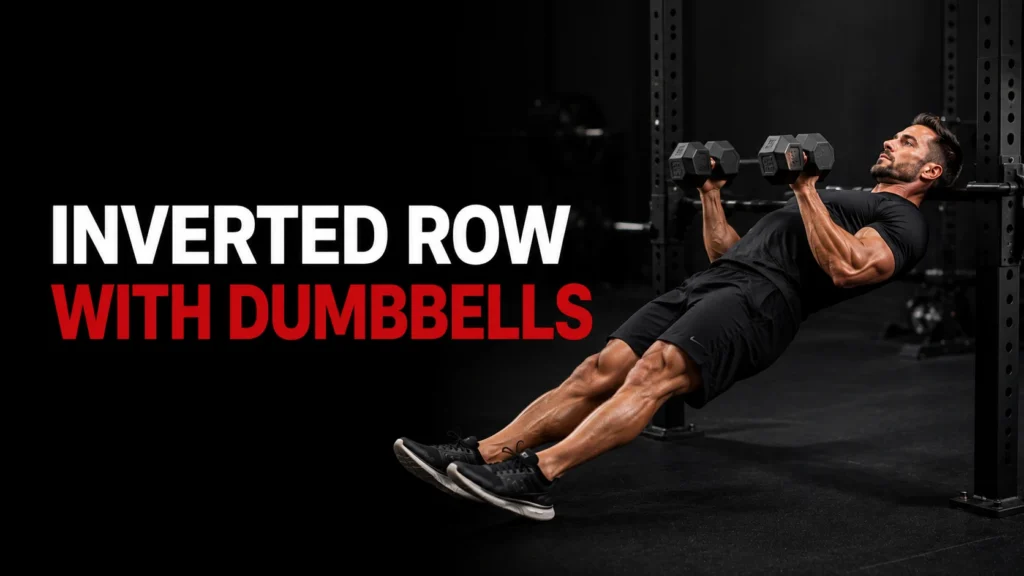
The inverted row is a horizontal pulling movement where you lie beneath a fixed bar, grab it, and row yourself upward until your chest meets the bar. Your body stays rigid — heels on the floor, glutes squeezed, core braced — like a reverse plank that moves.
The dumbbell adaptation works differently depending on your setup. The most accessible version is the chest-supported incline dumbbell row, sometimes called the incline bench row. You lie face-down on an incline bench set to 30-45 degrees, let the dumbbells hang below your chest, and row them toward your hips. The bench replaces the bar — it handles the support your body needs so you can focus entirely on pulling.
There’s also the renegade row, which takes the floor-plank version of the inverted row and adds dumbbells beneath each hand. You get pulling and core stability in one movement, though the loading is more limited.
The core principle is the same regardless of which version you use: your body is the resistance and your upper back does the pulling.
Muscles Worked During the Inverted Row With Dumbbells
Primary Muscles
Latissimus Dorsi (Lats) Your lats are the large fan-shaped muscles that run down each side of your back and attach to your upper arms. In the inverted row, they pull your arms back toward your torso — which is their primary job. When the lats are well developed, they give the torso that V-taper shape. During the dumbbell chest-supported version, the lats carry most of the load.
Rhomboids These sit between your shoulder blades and pull them together. The inverted row actually loads the rhomboids more than the pull-up does, making it one of the better exercises for this often-neglected area. Weak rhomboids are a major contributor to rounded shoulders and poor posture.
Trapezius The traps are a kite-shaped muscle that runs from your neck down to the middle of your back and out toward your shoulders. In the inverted row, the middle and lower trap fibers are especially active — they help retract and depress the scapula as you pull.
Rear Deltoids The posterior deltoid is the back head of your shoulder muscle. It assists with shoulder extension and horizontal abduction, both of which happen when you pull yourself toward the bar. Most chest-dominant lifters are deficient here, and the inverted row addresses that directly.
Secondary Muscles
Biceps and Forearms Elbow flexion is required to pull your arms up during each rep, which means the biceps are always involved. Your forearm muscles engage to maintain grip, especially during the renegade row variation where grip stability matters more.
Core Musculature The rectus abdominis, transverse abdominis, and obliques all fire isometrically during the standard inverted row. They keep your torso rigid. In the chest-supported version, the bench handles the stability load — which is actually useful for isolating the back — but in the renegade row, the core has to work full-time throughout the set.
Erector Spinae In the bodyweight inverted row, the spinal erectors engage isometrically to hold your lower back in extension. In the chest-supported dumbbell version, they still activate, but with less demand because your torso rests on the bench.
Glutes and Hamstrings During a standard inverted row, your glutes and hamstrings work symmetrically throughout the movement to keep your hips aligned with your shoulders and heels. Squeezing your glutes before you start each rep is worth making a habit — it locks your lower half into position and prevents hip sagging.
How to Do the Chest-Supported Dumbbell Row (Step-by-Step)
This is the most practical dumbbell adaptation of the inverted row for home and gym training. It removes lower back stress, prevents momentum from entering the movement, and makes it easier to train each side evenly.
Equipment You Need
An adjustable incline bench set to 30-45 degrees and a pair of dumbbells. A steeper angle tends to load the upper traps and rhomboids more; a flatter angle shifts emphasis toward the lats. Most people find 45 degrees comfortable to start.
Setup
Set the bench to 45 degrees. Pick up your dumbbells and approach the bench from the back, then carefully lie face-down with your chest against the pad. Your head should be higher than the bench, and the balls of your feet should be in contact with the floor. Let both arms hang straight down with a neutral grip — palms facing each other.
The Movement
Retract your shoulder blades before you pull. This is not optional — it ensures your lats and mid-back muscles initiate the movement rather than your arms and traps. From there, drive your elbows back and up toward the ceiling, bringing the dumbbells toward your hips or lower ribs. Your elbows should travel close to your sides throughout.
Hold the contraction at the top for one to two seconds. Then lower the dumbbells in a slow, controlled arc until your arms are fully extended and your shoulder blades protract slightly. Full extension at the bottom is important — it gives you a proper stretch on the lats and ensures you’re not shortchanging your range of motion.
Breathing
Inhale at the bottom of each rep. Exhale as you pull the dumbbells up. Keep breathing through the set — holding your breath through multiple reps under load creates unnecessary tension.
Sets and Reps
For building muscle (hypertrophy), 3-4 sets of 8-12 reps work well. For strength, drop to 3-5 sets of 4-6 heavier reps. If you’re using this for endurance or as part of a circuit, 2-3 sets of 12-20 reps with a lighter dumbbell gets the job done.
How to Do the Renegade Row With Dumbbells
Setup
Place two dumbbells on the floor, parallel and roughly shoulder-width apart. Use hexagonal (hex) dumbbells if possible — round dumbbells roll, which creates an unnecessary stability problem. Get into a push-up position with your hands gripping the handles. Arms straight, body in a rigid plank from head to heels. Feet can be set wide for more stability, or brought in if you want a greater challenge.
The Movement
Shift your weight slightly to one side. Keeping your core braced and hips square to the floor — this is the part people get wrong — row one dumbbell upward, leading with your elbow. Pull until your elbow passes your torso level. Pause at the top, then lower the dumbbell slowly. Repeat on the other side. One row on each arm counts as one rep.
The goal is to keep your hips from rotating. If you’re twisting to lift the dumbbell, the weight is too heavy or you’re rushing. Drop the load and slow down.
The Standard Bodyweight Inverted Row
For those who have access to a Smith machine, power rack, or even a sturdy table, the bodyweight inverted row is worth knowing.
Set a barbell in the rack at around waist height, or lock the Smith machine bar in place at the same level. Lie underneath it, grip the bar with both hands just outside shoulder width, and extend your body with heels on the floor. Your body should be in a straight diagonal line from head to heel. Pull your chest to the bar while keeping your elbows at roughly 45 degrees from your torso. Lower back down under control.
To incorporate dumbbells here, some trainees hold a dumbbell across their chest or wear a loaded backpack to add resistance once bodyweight alone becomes too easy. It’s a simple way to continue progressing without elevated feet or a weighted vest.
Common Mistakes That Kill Your Progress
Lifting Your Chest Off the Bench In the chest-supported row, keeping your chest against the pad is the whole point. The moment your torso lifts, momentum takes over and you start loading your lower back. If you’re doing this, the weight is too heavy.
Flaring Your Elbows Elbows flared wide shifts work to the shoulders and biceps instead of the lats. Keep them close to your body and think about driving them back toward your hips, not out to the sides.
Incomplete Range of Motion Not fully extending at the bottom is one of the most common reps-cutting habits. You need that stretch at the bottom to load the lats effectively. Cutting it short means you’re only working half the muscle through half the movement.
Rushing the Reps Fast reps feel more productive, but aren’t. The muscles under tension for a longer time are what drive adaptation. A controlled 2-second pull and 3-second lowering phase outperforms ten sloppy reps every time.
Shrugging at the Top Shrugging your shoulders at peak contraction shifts the work to your upper traps and takes tension off the mid-back. Consciously keep your shoulders down and back throughout each rep.
Starting Too Heavy The chest-supported position removes the ability to use body momentum, so most people can lift less weight than they expect. Start lighter than you think necessary and focus on feeling the lats and rhomboids engage before adding load.
Variations and Progressions
Beginner: Feet-Bent Standard Inverted Row
If the full inverted row is too difficult, bend your knees and plant your feet flat on the floor. This shortens the lever arm and reduces the percentage of your bodyweight you’re lifting. Build up to full extension before progressing further.
Intermediate: Tempo Chest-Supported Dumbbell Row
Add a slow tempo — three seconds up, one second hold, three seconds down. The time under tension increases dramatically, and you’ll likely need to drop 20-30% of your normal weight to maintain control throughout.
Intermediate: Single-Arm Chest-Supported Row
Performing one arm at a time eliminates the ability to compensate with your stronger side. It also introduces a mild rotational challenge that forces your core to stabilize. This is particularly useful for identifying and correcting left-right strength imbalances.
Advanced: Feet-Elevated Inverted Row
Propping your feet on a bench or plyometric box during the standard inverted row increases the portion of your bodyweight you’re pulling. Your body is now in a declined position, and the movement becomes significantly harder. This is the bodyweight equivalent of adding plates to the bar.
Advanced: Renegade Row With Push-Up
Sequence a push-up between each pair of rows. The pattern is: row left, row right, push-up, repeat. This adds a chest and triceps stimulus to the back and core work already present, making it a true full-body compound movement.
Loaded Variations
Add a weight vest to the bodyweight inverted row once bodyweight alone stops being challenging. Alternatively, fill a backpack with books if a vest isn’t available — it’s unglamorous but it works.
For the chest-supported version, simply increase dumbbell weight in small increments. A drop-set technique works particularly well here: start with a heavier pair, row to fatigue, then immediately switch to a lighter pair and continue. The Athlean-X method involves positioning lighter dumbbells on the floor to touch at the bottom of each heavier rep — this gives you a tactile depth cue and makes the drop-set transition smooth.
Why the Inverted Row With Dumbbells Deserves More Attention
Most people who train with dumbbells focus heavily on the chest, shoulders, and arms. The back gets one or two bent-over row sets and that’s it. The result is exactly what you’d expect — rounded shoulders, tight pecs, weak rhomboids, and a posture that says “I skip back day.”
The chest-supported dumbbell row forces work on the antagonist muscles — the ones on the back side of the shoulder joint — that most dumbbell-focused routines largely ignore. It teaches scapular retraction and teaches it in a position that’s hard to cheat. The rear deltoids get loaded. The rhomboids have to actually do something. And your lower back isn’t paying any tax for it, because your chest is on a bench.
The renegade row adds core anti-rotation to the equation — a quality that has real carryover to athletic performance and everyday movement. When you carry groceries, move furniture, or pick something up and twist to set it down, you’re relying on exactly the muscles the renegade row trains.
None of this is complicated. You need dumbbells and a bench. The exercise fits into any training split. The learning curve is gentle compared to more technical pulling movements. And the return — stronger, thicker upper back, better posture, healthier shoulders — is straightforwardly worth it.
Frequently Asked Questions (FAQs)
Can I do an inverted row with just dumbbells and no bar?
Yes. The chest-supported incline dumbbell row is the most practical dumbbell-only version of the inverted row. Set an adjustable bench to 30-45 degrees, lie face-down with your chest on the pad, and row the dumbbells toward your hips. The renegade row is another option that requires only dumbbells and a clear floor.
What muscles does the inverted row with dumbbells work?
The primary muscles are the latissimus dorsi, rhomboids, trapezius, and rear deltoids. The biceps and forearms assist with elbow flexion and grip. The core — including the rectus abdominis, transverse abdominis, and obliques — works isometrically to stabilize your position, and the glutes engage to keep your hips aligned.
Is the inverted row good for beginners?
It’s one of the better beginner pulling exercises because the difficulty scales easily. In the bodyweight version, bending your knees reduces the load. In the chest-supported dumbbell version, you simply start with lighter weights and build from there. It’s also joint-friendly compared to heavier barbell variations, making it a safe entry point for people new to pulling movements.
How does the inverted row compare to pull-ups?
The inverted row is a horizontal pull; the pull-up is a vertical pull. The inverted row loads the rhomboids and mid-traps more, while the pull-up emphasizes the lats and biceps to a greater degree. Both are valuable and serve different functions in a training program. For beginners working toward their first pull-up, the inverted row builds the prerequisite scapular control and upper-back pulling strength.
What angle should the bench be at for a chest-supported dumbbell row?
Most coaches recommend 30-45 degrees. A steeper angle targets the upper traps and rhomboids more; a flatter angle puts more emphasis on the lats. The difference between 30 and 45 degrees is subtle, so the best angle is whichever lets you perform the full movement cleanly and feel the right muscles working.
How many sets and reps should I do?
For muscle building: 3-4 sets of 8-12 reps. For strength: 3-5 sets of 4-6 reps with heavier dumbbells. For endurance or conditioning circuits: 2-3 sets of 12-20 reps. In all cases, stay within 2-3 reps of failure on each set to ensure the stimulus is challenging enough to drive adaptation.
Can the inverted row help with pull-up progression?
Yes. It builds the scapular retraction and general upper-back pulling strength that transfer directly to pull-up performance. Strength and conditioning coaches consistently recommend horizontal pulling movements like the inverted row as preparatory work for athletes working toward their first unassisted pull-up.
Why does my lower back hurt during dumbbell rows?
In the standard bent-over dumbbell row, lower back discomfort often comes from losing the hip hinge position under load or using a weight that’s too heavy to control. Switching to the chest-supported version eliminates this entirely — your torso rests on the bench and your lower back is not involved in the movement. If you’re still experiencing discomfort in the chest-supported version, check that you’re not hyperextending your spine to lift the weight.
Should I use a neutral or overhand grip?
For the chest-supported dumbbell row, a neutral grip (palms facing each other) is the most comfortable for most people and allows a longer range of motion through the shoulder joint. An overhand grip (palms facing back) is usable but tends to load the forearms more and can feel awkward at the shoulder. Either works — start with neutral and adjust based on what feels right.
How often should I train the inverted row?
Two to three times per week is appropriate for most people. Because the inverted row is low on spinal load and doesn’t heavily tax the nervous system the way heavy compound lifts do, recovery is relatively fast. It fits well into upper/lower splits, push/pull/legs programs, or full-body routines.
In conclusion
The inverted row with dumbbells is not a flashy exercise. There’s no heavy barbell, no dramatic range of motion, no particularly impressive-looking setup. But it trains some of the most neglected muscles in the typical gym-goer’s program — the mid-back, rhomboids, rear delts — while being genuinely accessible with minimal equipment.
A pair of dumbbells and an adjustable bench cover the chest-supported version. Hex dumbbells and a floor get you renegade rows. You don’t need a power rack, a cable machine, or a pull-up bar drilled into a doorframe.
The case for including it is straightforward: most people who press a lot don’t pull enough. That imbalance shows up as rounded shoulders, tight pecs, and shoulder joints that complain during overhead work. Horizontal pulling movements fix that, and the chest-supported dumbbell row is one of the most accessible ways to get that work done without additional risk to your lower back.
Start there. Learn to feel your shoulder blades retract before you pull. Add load or difficulty when the current version stops being a challenge. That’s the whole program.
Want to build explosive power and full-body strength? Check out How to Do a Dumbbell Snatch for step-by-step form tips, common mistakes to avoid, and ways to improve technique safely.