Most people who want stronger glutes gravitate toward squats. That is not wrong, but it leaves a lot on the table. The hip thrusts with dumbbells, trains your gluteus maximus through its strongest range of motion: full hip extension. No other standard gym exercise loads that position quite the same way.
What Is the Dumbbell Hip Thrust?
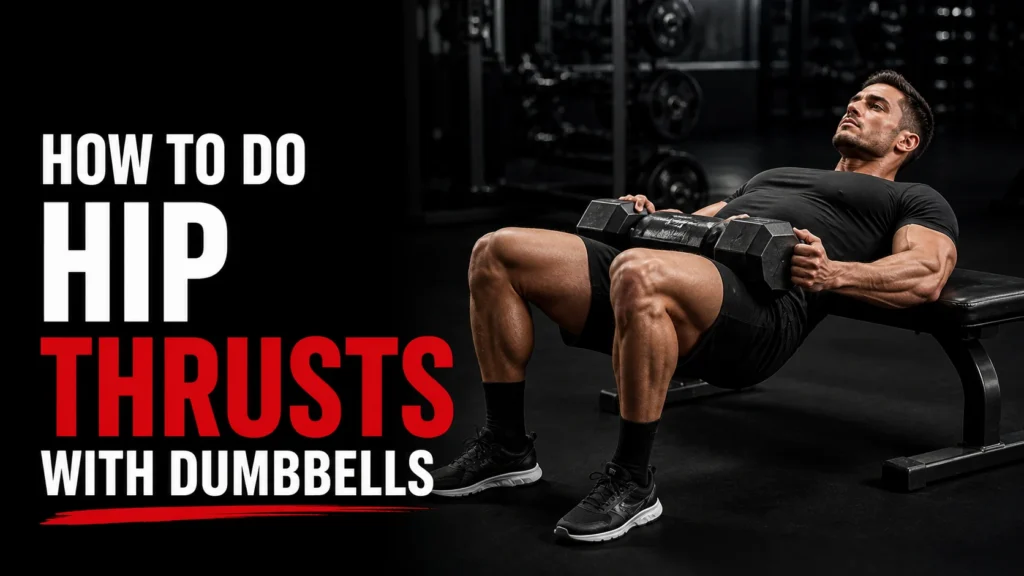
The dumbbell hip thrust is a lower-body strength exercise performed with your upper back resting on a bench, your feet flat on the floor, and a dumbbell placed across your hip crease. You drive your hips upward until your torso is parallel to the ground, then lower back down under control.
What separates it from exercises like squats and deadlifts is the loading angle. Squats and deadlifts are vertically loaded, meaning gravity works against you as you move up and down. The hip thrust is horizontally loaded: at the top of the movement, when your glutes are fully contracted, the resistance is still directly opposing them. That is exactly where the gluteus maximus is strongest, and it is why the hip thrust produces such high glute activation numbers in electromyography (EMG) research.
Compared to the barbell version, the dumbbell variation is easier to set up, more beginner-friendly, and requires no barbell rack or loading station. You can do it at home, in a hotel gym, or in a crowded commercial gym without monopolizing equipment.
Muscles Worked During Hip Thrusts with Dumbbells
Gluteus Maximus (Primary)
The gluteus maximus is the largest muscle in the human body and the main driver of hip extension. In a 2015 study published in the Journal of Applied Biomechanics by Contreras et al., the barbell hip thrust produced significantly greater mean and peak gluteus maximus EMG activity compared to the back squat. Mean upper glute activation was 69.5% versus 29.4% for the squat. Lower glute activation reached 86.8% versus 45.4%. That gap is not trivial.
A 2021 study in the Journal of Strength and Conditioning Research (Williams et al.) found that peak EMG activity in the gluteus maximus during the hip thrust was significantly higher than both the back squat and the split squat. The researchers also found a correlation between hip thrust ground reaction force and maximal sprint velocity, which suggests this exercise does more than just build muscle. It builds the kind of hip extension strength that transfers to athletic movement.
Hamstrings (Secondary)
Your biceps femoris assists the glutes in driving the hips up, particularly during the initial phase of the push. The same Contreras et al. study found that mean biceps femoris activation was 40.8% during the hip thrust versus 14.9% during the back squat. Your hamstrings are not the target here, but they contribute real work.
Quadriceps
The quads stabilize the knee joint throughout the movement. Their role becomes more pronounced when foot placement shifts closer to the body, which increases knee flexion and puts more demand on the front of the thigh.
Core and Erector Spinae
Your abdominals and obliques brace during each rep to prevent your lower back from hyperextending at the top. If your core is not engaged, your lumbar spine picks up the slack, which both reduces glute activation and increases injury risk.
Adductors
The inner thigh muscles assist in maintaining knee alignment. If your knees cave inward during the thrust, it is often a sign that your adductors and glute medius are not doing their share.
How to Set Up for Dumbbell Hip Thrusts
The bench: Use a flat bench, a sturdy box, or even a couch at home. The ideal bench height puts your shoulder blades at roughly the bottom edge when you sit on the floor against it. Too high and your range of motion shrinks. Too low and your hips will not reach full extension without your knees getting in the way.
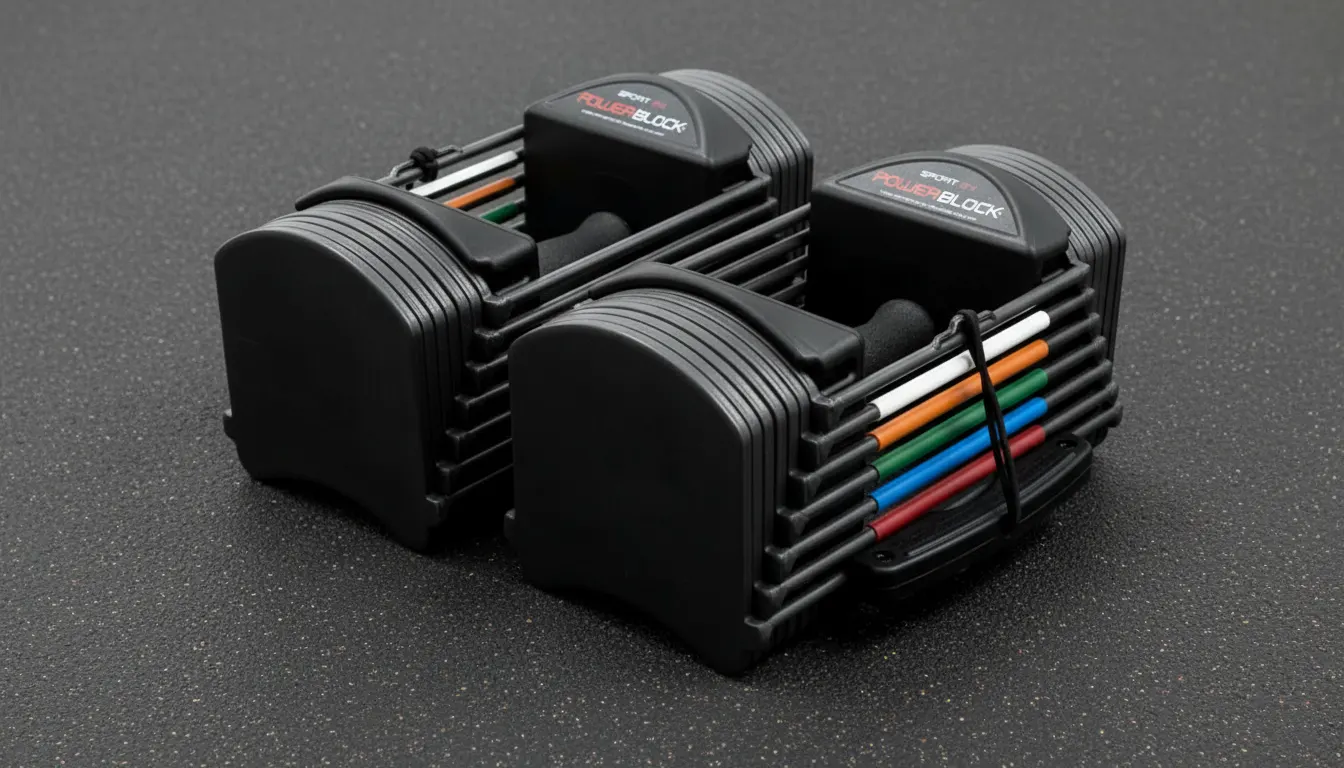
The dumbbell: Place a folded towel, foam pad, or yoga mat across your hip crease before positioning the dumbbell. The bony part of your pelvis does not enjoy 30 kilograms of cast iron sitting directly on it. A thin pad fixes that. Hold the dumbbell in place with both hands throughout the movement. It does not stay put on its own.
Your position on the bench: Sit on the floor with your back against the bench. The bottom of your shoulder blades, not your mid-back, should contact the bench edge. If your whole upper back is on the bench, your torso will be too upright at the top and you will lose range of motion.
Foot placement: Set your feet roughly shoulder-width apart with toes pointed slightly outward, about 15 to 30 degrees. At the top of the movement, your shins should be close to vertical and your knees should be stacked above your ankles. If your shins angle too far forward, your hamstrings take over. If your feet are too close, you put unnecessary stress on your knees.
Step-by-Step Form Guide for Dumbbell Hip Thrusts
Step 1: Get into position. Sit on the floor with your back against the bench and roll or place the dumbbell across your hip crease. Your feet should be flat on the floor, hip- to shoulder-width apart.
Step 2: Brace your core. Before the rep starts, take a breath in, tighten your abdominals, and posteriorly tilt your pelvis slightly. Think about tucking your tailbone under just a touch. This flattens your lower back and ensures the glutes initiate the movement rather than the lumbar extensors.
Step 3: Drive through your heels. Press your feet into the floor and drive your hips upward. The push comes from your feet and your glutes, not from arching your back.
Step 4: Lock out at the top. Stop when your torso is parallel to the floor, your hips are fully extended, and your knees, hips, and shoulders form a straight line. Your shins should be close to vertical. Squeeze your glutes hard for one to two seconds.
Step 5: Lower with control. Do not drop your hips. Lower them slowly back to the starting position, keeping tension in your glutes throughout the descent. Your hips do not need to touch the floor between reps if you are working for continuous tension.
Breathing: Inhale at the bottom, exhale at the top as you squeeze. Or use a Valsalva brace on heavier sets where spinal stability is a priority.
How Much Weight to Use
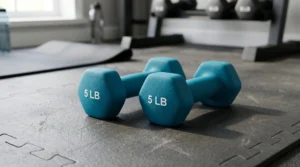
Start lighter than you think you need to. If you have never done hip thrusts before, use just your bodyweight for the first session to feel the movement pattern. Add a light dumbbell (5 to 10 kg / 10 to 20 lbs) once you can perform 15 clean reps without your lower back taking over.
For building muscle, a weight that challenges you within the 8 to 12 rep range is a reasonable target. For endurance or warm-up purposes, 15 to 20 reps with a lighter load works well. Once you are regularly handling 20 to 30 kg in a dumbbell, it is worth considering the barbell version, which allows for more loading without the awkwardness of a very large dumbbell on your hips.
Progressive overload is the key variable. Add weight, reps, or sets gradually across weeks. Your glutes respond to increased challenge over time, not to doing the same thing every session.
Common Mistakes That Limit Results
Overextending the Lower Back at the Top
This is the most common error and the most damaging one. At the top of the movement, some people push their hips so high that their lumbar spine hyperextends to compensate. The glutes stop being the primary mover and the lower back takes over. It feels like a bigger range of motion but it is not. Stop when your body forms that straight line from shoulders to knees.
Feet in the Wrong Position
Feet that are too far from the bench shift the load toward the hamstrings. Feet too close under your hips increase knee stress and reduce glute engagement. The test is simple: at the top of each rep, your shins should be roughly vertical. If they are angled forward or backward significantly, adjust your foot position.
Skipping the Glute Squeeze
Driving your hips up without consciously squeezing at the top misses the point of the exercise. The glute squeeze at lockout is where maximum activation occurs. Hold it for at least one full second on each rep.
Letting the Knees Cave Inward
Knee cave (valgus collapse) during the thrust indicates weak glute medius, weak adductors, or both. Place a light resistance band just above the knees and actively press outward against it. This cue fixes knee cave faster than almost anything else.
Going Too Heavy Too Soon
Using a dumbbell that is too heavy forces compensation. Your lower back arches, your feet shift, your core stops bracing, and the glutes end up doing maybe half the work they should. The exercise only works well when form stays intact.
Rushing the Reps
Bouncing through repetitions removes the tension that produces muscle growth. Slow the lowering phase down to a two- or three-second count. That eccentric control is where a lot of the stimulus lives.
Dumbbell Hip Thrust Variations
Single-Leg Dumbbell Hip Thrust
Extend one leg straight in front of you while performing the thrust on the other side. This eliminates the stronger leg compensating for the weaker one, which is common in the standard bilateral version. It is harder than it looks and a useful tool for identifying and correcting strength imbalances between sides.
Dumbbell Glute Bridge (Floor Variation)
The glute bridge is the hip thrust’s cousin. Your upper back stays on the floor rather than elevated on a bench, which reduces the range of motion at the bottom. It is a solid beginner entry point and a good warm-up for the full hip thrust. The glute activation is lower because the shortened range of motion at the bottom limits how much stretch the glutes get before they contract.
Banded Dumbbell Hip Thrust
Loop a resistance band just above the knees and add your dumbbell for load. The band creates abduction resistance throughout the movement, pulling your knees inward while you actively push them out. This recruits the glute medius alongside the maximus and adds variety without requiring more weight.
B-Stance Dumbbell Hip Thrust
One foot is planted flat on the floor as normal. The other is placed slightly behind, with only the toes touching the ground. Most of the load falls on the front leg. It is a middle ground between bilateral and single-leg work, useful when single-leg reps feel too unstable or when you want to overload one side with more weight than a true single-leg can handle.
Elevated Feet Dumbbell Hip Thrust
Place your feet on a low box or step instead of the floor. This increases the range of motion at the bottom of the movement, giving the glutes a longer stretch before they contract. It is a more advanced variation that increases both difficulty and time under tension.
Dumbbell Hip Thrust vs. Glute Bridge: What Is the Difference?
They look similar. The mechanics are slightly different in ways that matter.
In a glute bridge, your entire back stays on the floor. In a hip thrust, your upper back is elevated on a bench. That elevation allows your hips to drop lower at the start of each rep, increasing the range of motion. More range means a longer stretch on the glutes at the bottom, which contributes to greater stimulus for muscle growth.
Glute bridges are excellent for beginners, for people with lower back sensitivity, and as a warm-up movement. Hip thrusts are the stronger choice for anyone pursuing hypertrophy or strength in the glutes because they allow more load and a fuller range of motion.
How to Program Dumbbell Hip Thrusts
Frequency: Two sessions per week is generally optimal for glute development, with at least 48 hours between sessions to allow adequate recovery.
Volume: Research published in 2024 suggests that 5 to 10 working sets per week per muscle group is the effective range for hypertrophy, with four sets per week being a floor, not a ceiling. For someone programming hip thrusts twice weekly, three to four sets per session gets you into that range.
Sample lower-body session structure:
- Bodyweight glute bridge or light dumbbell glute bridge: 2 sets x 15 reps (warm-up)
- Dumbbell hip thrust: 3 to 4 sets x 8 to 12 reps (main working sets)
- Single-leg dumbbell hip thrust: 2 sets x 8 to 10 reps per side
- Romanian deadlift with dumbbells: 3 sets x 8 to 10 reps
- Banded side steps or clamshells: 2 sets x 15 reps per side
The hip thrust pairs well with squats and deadlifts because the movement patterns are different. Squats and deadlifts are vertically loaded and more quad-dominant. Hip thrusts fill the horizontal loading gap and bring the glutes and hamstrings up to speed.
How fast to expect results: A 2017 study found that muscle growth can appear in as few as four weeks in untrained individuals. A 2018 review found that significant strength gains typically take eight to twelve weeks of consistent training. Consistency, progressive overload, and adequate protein intake (0.7 to 1 gram per pound of bodyweight daily is the commonly cited range for muscle building) are the variables that determine the timeline.
Benefits Beyond Glute Size
Improved Athletic Performance
Hip extension strength is one of the foundational qualities in sprinting, jumping, and direction changes. The 2021 Williams et al. study found that peak sprint velocity correlated with ground reaction force during the hip thrust, suggesting the exercise builds the kind of hip extension power that carries over to sport. Stronger glutes mean more force production at the hip, which shows up in virtually every athletic movement.
Reduced Lower Back and Knee Pain
Weak glutes force the lower back and knees to compensate during everyday movements and exercise. Strengthening the gluteus maximus and stabilizing the pelvis takes load off those joints. Many people with chronic lower back tightness find that dedicated glute training reduces their symptoms, though this is not a substitute for medical evaluation if pain is significant.
Better Posture
Prolonged sitting shortens the hip flexors and often allows the glutes to become neurologically underactive. Hip thrusts counteract that by training full hip extension, which lengthens the hip flexors through the movement and re-engages the glutes. People who sit for most of the day often find this exercise specifically useful for improving how they carry themselves.
Improved Bone Density
Resistance training is one of the few interventions with strong evidence for improving bone density, particularly in the hip and lumbar spine. Hip thrusts apply load through the pelvis and lower body in a way that is accessible even to those who cannot tolerate axial loading from squats or deadlifts.
Frequently Asked Questions (FAQs)
Are hip thrusts with dumbbells as effective as with a barbell?
For beginners and intermediate lifters, yes. The movement pattern and muscular stimulus are the same. The main difference is that barbells allow much heavier loading, which matters more at advanced training levels. If you are newer to hip thrusts or working with dumbbells up to around 20 to 30 kg, you are not leaving significant results on the table.
Should I feel hip thrusts in my lower back?
You should not feel them primarily in your lower back. Some mild fatigue there is normal since the erectors assist in stabilizing. But if your lower back is doing most of the work or feels sore after, your hips are likely overextending at the top. Stop the movement when your torso is parallel to the floor, brace your core harder, and reduce the weight until the pattern feels clean.
How many reps and sets should I do?
For muscle growth, 3 to 4 sets of 8 to 12 reps with a challenging weight is a solid baseline. For endurance or higher-rep work, 2 to 3 sets of 15 to 20 reps with a lighter dumbbell also builds a foundation. Both approaches can produce results; the key is that the last two or three reps of each set should feel genuinely difficult.
Can I do hip thrusts every day?
No, and there is no real reason to. Muscle grows during recovery, not during training. Hip thrusts two to three times per week with at least 48 hours between sessions is the practical limit for most people before diminishing returns set in.
Do hip thrusts help with back pain?
For many people, stronger glutes reduce the load on the lower back and lessen chronic tightness. But this depends heavily on the cause of the pain. If your back pain comes from weak hip extensors and a posteriorly tilted pelvis, hip thrusts may help significantly. If the pain is structural or nerve-related, consult a physiotherapist or doctor before adding loaded hip extension work.
What is the difference between a hip thrust and a glute bridge?
The setup. A glute bridge keeps your upper back flat on the floor. A hip thrust elevates your upper back on a bench. The elevation in the hip thrust allows for greater hip flexion at the bottom, which means a fuller range of motion and more glute stretch before the contraction. Hip thrusts generally produce more stimulus for hypertrophy as a result.
What bench height works best for dumbbell hip thrusts?
A standard flat bench at roughly 40 to 45 cm (16 to 18 inches) from the floor works well for most people. Your bottom shoulder blade should contact the edge of the bench in the starting position. If the bench is too high, your upper back cannot anchor properly and the movement becomes awkward.
Should my feet be flat or can I raise my heels?
Flat feet, every time. Raising your heels reduces stability, shifts the load toward your quads, and limits the drive you can produce through the floor. Press the entire sole of your foot down on each rep.
How do I keep the dumbbell from sliding around?
Use a folded towel, foam pad, or hip thrust pad between the dumbbell and your hips. This also reduces the pressure on the pelvic bones, which makes it easier to use heavier weights without discomfort. Hold the ends of the dumbbell with both hands throughout the set.
Do hip thrusts work without a bench?
The floor glute bridge is the equipment-free alternative. You do give up the increased range of motion that the bench provides, but you still get significant glute activation. For home training without any furniture to use as a bench, the floor version is a reasonable substitute, especially with a heavy dumbbell.
In conclusion
Hip thrusts with dumbbells are one of the more direct and research-backed ways to train the gluteus maximus. The horizontal loading angle means peak resistance lands exactly when and where the glutes are strongest. The setup is minimal. The progressions are clear. And the carryover to athletic performance, posture, and lower body strength is well-documented.
Sort the setup out before adding weight. Bench at the right height, feet where your shins stay vertical at the top, core braced, pelvis tucked. Drive through your heels, hold the squeeze, lower slowly. Done right, twice a week, over a few months, this exercise produces results that squats alone simply do not.